
Canopy tents offer versatile shelter for events‚ markets‚ and outdoor recreation‚ providing shade and protection from the elements.
These portable structures are known for their quick and relatively easy setup‚ making them a popular choice for various occasions.
Understanding the basics of canopy tent functionality and setup is crucial for a safe and enjoyable experience.
This guide will walk you through everything you need to know‚ from initial unpacking to securing your tent against the wind.
With a little preparation and these instructions‚ you’ll be enjoying the benefits of your canopy tent in no time!
What is a Canopy Tent?
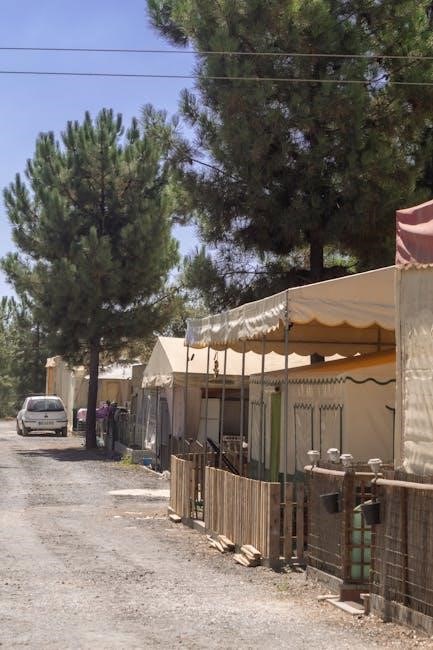
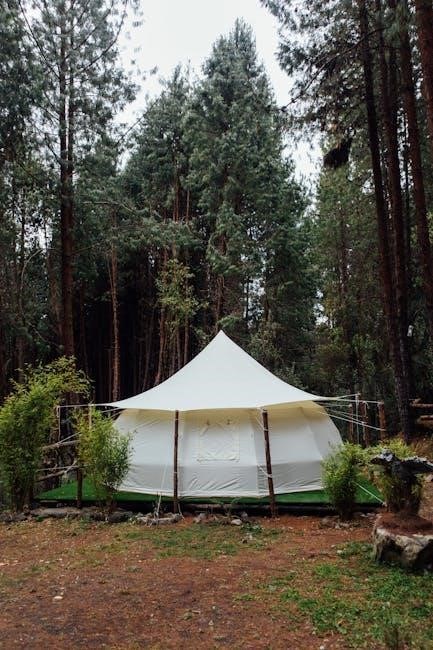
Canopy tents‚ often called pop-up tents or party tents‚ are portable‚ temporary shelters constructed with a folding frame and a fabric canopy top; They are designed for quick assembly and disassembly‚ typically requiring minimal tools or expertise.
The core structure consists of interconnected metal poles that spring open when released‚ forming a self-supporting frame; This frame is then covered with a durable‚ weather-resistant fabric – often polyester or polyethylene – to create the canopy.
These tents come in various sizes and shapes‚ catering to different needs‚ from small market stalls to large event spaces. Their primary function is to provide shade‚ shelter from light rain‚ and a designated area for activities. Modern designs often include features like sidewalls for added protection and weighted legs for stability.
Benefits of Using a Canopy Tent
Canopy tents offer a multitude of advantages‚ making them invaluable for diverse outdoor scenarios. They provide instant shade‚ protecting users and merchandise from harsh sunlight‚ reducing heat stress and preventing damage.
These tents also offer reliable shelter from light rain and wind‚ keeping people and belongings dry and comfortable. Their portability allows for easy transport and setup at various locations – from picnics and festivals to markets and sporting events.
Furthermore‚ canopy tents create a defined space‚ enhancing visibility and professionalism for vendors or providing a dedicated gathering area. They are a cost-effective solution for temporary shelter‚ offering significant value and convenience.

Unpacking and Inventory
Carefully unpack your canopy tent and lay out all components. Verify everything listed in the manual is present before beginning setup for a smooth process.
Checking for Missing Parts
Before you start assembling your canopy tent‚ a thorough inventory is essential. Compare the contents of the package against the parts list included in the instruction manual.
Typically‚ you should find the tent frame‚ the canopy top‚ stakes‚ ropes‚ and potentially sidewalls.
Don’t overlook smaller components like buttons‚ clips‚ or joint connectors.
If anything is missing‚ contact the retailer or manufacturer immediately to request replacements.
Attempting to set up the tent without all the necessary parts can be frustrating and compromise its stability and safety.
A complete inventory ensures a hassle-free setup experience.
Identifying Tent Components
Familiarizing yourself with each part of your canopy tent is crucial for a smooth setup. The frame usually consists of interconnected legs and roof supports‚ often made of steel or aluminum.
The canopy top is the fabric covering that provides shade and protection‚ typically made of polyester or polyethylene.
Stakes are used to secure the tent to the ground‚ while ropes provide additional stability‚ especially in windy conditions.
Sidewalls‚ if included‚ attach to the frame to create enclosed spaces.
Understanding how these components fit together will significantly simplify the assembly process and ensure a secure structure.
Refer to the manual’s diagrams for visual guidance.
Step-by-Step Setup Instructions
Setting up a canopy tent involves a few key steps‚ ensuring a stable and secure shelter.
Follow these instructions carefully for a quick and efficient assembly process‚ maximizing your enjoyment.
Let’s begin with unfolding the frame and extending the legs for a solid base.
Step 1: Unfolding the Frame
Begin by carefully removing the canopy tent frame from its carrying case. Lay the collapsed frame on a flat‚ open surface‚ ensuring ample space around it. Gently release the latches or straps securing the folded frame.
Allow the frame to begin expanding automatically; it’s designed to “pop up” with a bit of force. If it doesn’t fully extend‚ gently push outwards on the legs to encourage full deployment. Avoid forcing it‚ as this could damage the mechanism.
Once the frame is fully unfolded‚ verify that all legs are extended and locked into place. This initial step establishes the foundation for a stable canopy structure‚ so double-checking is essential.
Step 2: Extending the Legs
With the frame unfolded‚ focus on extending the legs to your desired height. Most canopy tents feature telescoping legs with push-button or clamp-lock mechanisms. Locate these release levers on each leg.
Pull the lower section of each leg outwards‚ adjusting it to the desired height setting. Secure each leg by engaging the push-button or tightening the clamp. Ensure all legs are set to the same height for a level canopy.
Double-check that all locking mechanisms are firmly engaged to prevent accidental collapse during use. A stable base is crucial for safety and structural integrity‚ so take your time with this step.
Step 3: Attaching the Canopy Top
With the frame fully extended‚ carefully drape the canopy top over the structure. Ensure the canopy is oriented correctly‚ with the desired side facing outwards. Most canopies have corner straps or Velcro attachments.
Secure each corner of the canopy top to the corresponding frame leg‚ using the provided straps or Velcro. Work your way around the canopy‚ ensuring a snug and even fit.
Pull the fabric taut to minimize wrinkles and maximize coverage. Some canopies may have additional attachment points along the sides; secure these as well. A properly attached canopy top is essential for weather protection.
Securing Your Canopy Tent
Properly securing your canopy tent is vital for stability‚ especially in windy conditions. Stakes and ropes are essential tools for anchoring the tent firmly to the ground.
Effective anchoring prevents unwanted movement and potential damage during use.
Using Stakes and Ropes
Stakes and ropes are fundamental for securing your canopy tent‚ preventing it from becoming airborne or collapsing in even moderate winds. Begin by attaching ropes to the designated loops or grommets on the canopy’s legs.
These ropes should then be extended outwards at a 45-degree angle from each leg. Drive the stakes through the rope loops and firmly into the ground‚ ensuring they are angled slightly away from the tent.
A small mallet can be incredibly helpful for this process. Always use all provided stakes and ropes‚ even if the weather seems calm‚ as conditions can change rapidly. Regularly check the tension of the ropes and re-stake if necessary.
Proper Stake Placement Techniques
Effective stake placement is critical for canopy tent stability. Avoid driving stakes straight down‚ as this reduces their holding power. Instead‚ angle them at approximately 45 degrees‚ pointing away from the tent’s legs.
Choose a location free of rocks‚ roots‚ or other obstructions that could impede penetration. For softer ground‚ consider using longer stakes or doubling up on stakes for increased security.
If the ground is particularly loose‚ create a small “anchor” by digging a shallow hole and burying the stake horizontally before driving it in vertically. Regularly inspect stake placement‚ especially after changes in weather‚ to ensure continued security.

Windproofing Your Canopy Tent
Securing your canopy against wind is paramount for safety and longevity. Utilize weights and reinforced stakes to withstand gusts‚ understanding your tent’s wind rating.

Proper anchoring prevents damage and ensures a stable shelter during outdoor events.
Reinforcing with Weights
Adding weight to your canopy tent is a crucial step in windproofing‚ especially when stakes alone aren’t sufficient. Weight bags‚ filled with sand or water‚ should be attached to each leg of the canopy.
Distribute the weight evenly for optimal stability. The amount of weight needed depends on the tent size and expected wind conditions; generally‚ 10-25 pounds per leg is recommended.
Avoid using bricks or rocks directly‚ as they can damage the tent legs;
Consider using canopy weights specifically designed for this purpose‚ offering a secure and protective solution. Regularly check the weights to ensure they remain full and properly attached‚ particularly during prolonged use or changing weather.
Properly weighted canopies significantly reduce the risk of tipping or damage in windy conditions.
Understanding Wind Ratings
Canopy tents are often assigned wind ratings‚ indicating the maximum wind speed they can withstand. These ratings are typically expressed in miles per hour (MPH) or kilometers per hour (km/h).
However‚ it’s vital to remember that these ratings are based on ideal conditions – a fully secured tent with no sidewalls.
Real-world conditions‚ such as gusty winds or uneven ground‚ can significantly reduce a tent’s stability.
Always err on the side of caution and take down your canopy tent if winds exceed the rated speed.
Sidewalls increase wind resistance‚ lowering the effective wind rating. Prioritize safety and avoid using your canopy in severe weather.

Maintenance and Care
Regular cleaning and proper storage are essential for extending the life of your canopy tent.
This ensures it remains in optimal condition for future use and enjoyment.
Following these simple steps will help maintain its quality.
Cleaning Your Canopy Tent
Keeping your canopy tent clean is vital for longevity and hygiene. After each use‚ especially following exposure to dirt‚ dust‚ or moisture‚ a thorough cleaning is recommended.
Start by brushing off any loose debris with a soft-bristled brush or cloth.
For more stubborn stains‚ mix a mild detergent with lukewarm water and gently scrub the affected areas using a sponge or soft cloth.
Avoid harsh chemicals or abrasive cleaners‚ as these can damage the fabric.
Rinse thoroughly with clean water to remove any soap residue.
Allow the canopy top and frame to air dry completely before storing. Ensure no moisture remains to prevent mildew growth.
Regular cleaning will help preserve the tent’s appearance and functionality.
Proper Storage Techniques
Correct storage is crucial for maintaining your canopy tent’s condition and extending its lifespan. Before storing‚ ensure the tent is completely dry to prevent mildew and mold growth.
Loosely fold or roll the canopy top‚ avoiding tight creases that can weaken the fabric.
Separate the frame components and store them in the provided carrying case or a similar protective bag.
Store the tent in a cool‚ dry place away from direct sunlight and extreme temperatures.
Avoid storing it in damp basements or hot attics.
Periodically check the stored tent for any signs of damage or deterioration. Proper storage ensures your tent is ready for its next use!

Troubleshooting Common Issues
Occasional hiccups during setup or use are normal. Addressing stuck legs or minor damage promptly ensures continued functionality and prevents further problems.
Simple fixes can save time and frustration!
Dealing with Stuck Legs
Stuck legs are a common frustration when setting up or taking down a canopy tent. Often‚ this occurs due to slight bends in the metal or a build-up of dirt and debris within the joints. Avoid forcing the legs‚ as this can cause damage!
Instead‚ gently try rotating the leg while simultaneously applying upward or downward pressure. A small amount of lubricant‚ like silicone spray‚ can also be helpful – apply it sparingly to the joint.
If the leg remains stubbornly stuck‚ having a second person assist can provide the extra leverage needed. Ensure both individuals apply even pressure to prevent bending or breaking the frame. Patience is key!
Repairing Minor Damage
Minor damage to your canopy tent‚ such as small tears in the canopy top or broken leg clips‚ can often be repaired relatively easily. For small tears‚ a canopy repair kit containing patches and adhesive is ideal. Clean the area thoroughly before applying the patch‚ ensuring a strong bond.
Broken leg clips can sometimes be replaced with universal clips available at hardware stores. If the frame itself is bent‚ carefully attempt to bend it back into shape‚ but avoid excessive force.
Reinforcing repaired areas with durable tape can provide extra security. Remember‚ addressing minor issues promptly prevents them from escalating into larger‚ more costly problems.
Advanced Setup Tips
For challenging setups‚ consider using leveling blocks under legs on uneven ground‚ and explore adding sidewalls for enhanced weather protection and privacy.
These additions maximize your canopy tent’s versatility!
Setting up on Uneven Ground
Dealing with an uneven surface requires a bit of ingenuity to ensure your canopy tent remains stable and secure. Begin by identifying the lowest points of the ground beneath where each leg will rest.
Utilize leveling blocks – these can be purchased specifically for tents‚ or you can improvise with sturdy pieces of wood or even stacked stones.
Place a leveling block under each leg that needs support‚ adjusting the height as needed until the frame is level.
Regularly check the level throughout the setup process‚ as adjusting one leg can affect others.
Ensure the blocks are stable and won’t shift under weight or wind pressure. A level tent is a safe tent!
Adding Sidewalls for Extra Protection
Sidewalls significantly enhance your canopy tent’s protection‚ shielding you from wind‚ rain‚ and sun. Most sidewalls attach using Velcro straps‚ hooks‚ or a combination of both‚ connecting to the tent frame.
Begin by aligning the sidewall with the tent leg and carefully attaching the fasteners‚ ensuring a snug fit. Work your way around the entire perimeter of the sidewall‚ securing it at each point.
For sidewalls with doors or windows‚ ensure these openings are properly positioned and secured when not in use.
Properly installed sidewalls create a more enclosed and comfortable space!

Safety Precautions
Always be aware of overhead power lines and branches when setting up your canopy tent. Supervise tent use‚ especially during windy conditions‚ for safety.
Avoiding Overhead Hazards
Before erecting your canopy tent‚ meticulously scan the surrounding area for potential overhead hazards. This includes‚ but isn’t limited to‚ power lines‚ tree branches‚ and any other obstructions that could pose a risk to the tent or its occupants.
Maintaining a safe distance from power lines is paramount; never assume they are insulated or harmless.
Falling branches‚ especially during inclement weather‚ can cause significant damage or injury.
Choose a location that offers ample clearance above the tent’s highest point.
Regularly check for any new hazards that may develop during the event‚ and be prepared to relocate the tent if necessary to ensure continued safety.
Supervising During Use
Consistent supervision is vital while your canopy tent is in use‚ particularly when children or pets are present. Ensure someone is designated to periodically check the tent’s stability and security‚ especially during windy conditions or changing weather patterns.
Monitor the tent for any signs of stress‚ such as bent poles or loose connections.
Educate users about the tent’s limitations and potential hazards.
Discourage climbing or hanging on the tent structure‚ as this can compromise its integrity.
Regular checks and attentive oversight contribute significantly to a safe and enjoyable experience for everyone.